Cyclists are innovators, constantly hunting for an edge. Over the last half-century, we’ve tried thousands of methods to become stronger, faster, and smarter on a bike—many of which have been discarded through the years. These have endured.
Bicycling Magazine

Photo by Peter Crowther
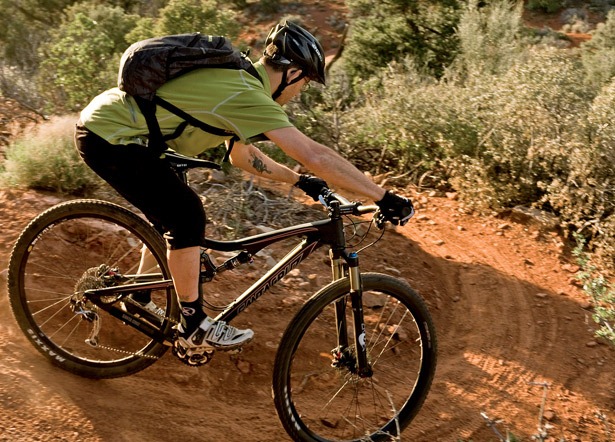
1. To corner, enter wide and exit wide.
2. Brake Less
It sounds counterintuitive, but the harder you yank on the brakes, the less control you have over your bike. The best riders brake well before a corner. Plus, laying off the stoppers forces you to focus on key bike cornering skills such as weight distribution, body position, and line choice.
3. Look Where You Want to Go
“When riding a tricky or dangerous section of trail (or road), focus on the path you want your bike to follow, not the rock, tree, or other obstacle you’re trying to avoid,” says globe-trotting mountain-biker Hans Rey.
4. Avoid Helmet Hair
“For God’s sake, make sure your hair is under your helmet and not poking out the front,” advises Garmin-Cervelo pro Christian Vande Velde.
5. Take the Lane
You have a right to the road, so use it. It’s safer than riding on the shoulder, which is often cracked, covered in gravel, or worse. But don’t be a road hog, either.
6. Ride with the Best
Before he built his first mountain bike, GARY FISHER was an aspiring road racer. But his decision to stay in America rather than train in Europe derailed his chances of joining the pro peloton. “To be the best at the sport, you need to go to where the best are riding,” Fisher says. “If you’re a mountain biker, spend a couple of weeks at Whistler and you will be changed forever. If you’re a road rider and want to be a better climber, go to Colorado. Find the best, train with them, watch what they do, and learn their secrets.”
7. Set Your Suspension—And Check It Often
It’s frightening how many riders hit the trail with poorly adjusted forks and shocks. Not only will droopy suspension make your bike feel like a wet noodle, it can also be downright dangerous. A few simple adjustments are all it takes to have your suspension smoothly sucking up bumps.
Here are some general guidelines, but be sure to read the manufacturer’s recommendations (found online or in your owner’s manual) because they will provide the starting point based on your bike’s suspension design. And because air can leak through the seals, remember to check your pressure monthly.
Sag
(How much the suspension compresses when you sit on the bike) |
Compression
(Controls the rate at which the suspension compresses in response to a bump) |
Rebound
(The rate at which the suspension returns to full extension) |
For XC: 20–25% of travel
For trail: 25–30% of travel
For DH: 30–35% of travel
For how to measure and
set sag, visit Bicycling.com/sagvideo. |
Start with the dial in the middle setting, and go ride. If the bike feels harsh, dial the damping down a click. If it feels mushy, add a click. Repeat until it feels smooth and supple. |
Again, start in the middle setting. Ride a short, rough section of trail. If the fork or shock seems too springy, add a click of rebound. If it bounces back too slowly, dial it back a click. |

8. Clean your shoes monthly. Also: wash your gloves.
9. Warm Up
A slow start primes your engine by directing oxygen from your blood cells to your muscles. Spin easy for 20 to 30 minutes before you begin to hammer.
10. Always Carry Cash
Money can’t buy love, but it can buy food, water, a phone call, or a spare tube.
11. Race, At Least Once
It will push you to ride harder than you previously thought possible.
12. Drink before you are thirsty; eat before you are hungry.
13. Eat Real Food On longer rides, easily digestible calories are key—and they shouldn’t come from just energy bars. James Herrera, MS, founder of Performance Driven Coaching, has a favorite: spread some almond butter on whole-grain bread and top with sliced bananas and agave nectar or honey.
14. Don’t Live in Your Chamois
When the shoes come off, your shorts should come off with them.
15. Ride Hard. . .
To become faster, you need to ride faster. Intervals squeeze every drop of fitness from your time on the bike. Try the following two or three times a week: Choose a route that includes a climb or stretch of road where you can go nearly all-out for three to five minutes. Warm up for 15 to 30 minutes, then ride hard—your exertion should be about a 7 out of 10—for three minutes. Recover for 90 seconds, then repeat the sequence four more times.
16. . . .But Not Every Day
Take 56-year-old mountain-bike legend Ned Overend’s advice: Rest often. And if you’re feeling cooked after a 30-minute warm-up, put it in an easy gear and spin home. “No workout is set in stone,” Overend says. “Your training needs to have structure, but it should be malleable based on how you’re feeling.” Which might explain why, 10 days before he won the 2011 Mt. Washington Hill Climb, Overend was surfing in San Diego.
17. Play the Terrain
Go hard on climbs and take it easy on descents.
18. Ride Another Bike
Explore the woods on a mountain bike. Throw down in the local cyclocross race. Mixing in different types of riding keeps you mentally fresh, boosts your skills, and reminds you that riding is fun.
19. Wear Out Your Shifters
You have lots of gears for a reason: to keep your cadence in the sweet spot. For silky-smooth gear changes, remember to shift before a punchy climb, sprint, or tight switchback.

20. Train Your Weaknesses
Professional endurance racer Mark Weir makes his living blasting through corners. But that wasn’t always the case. “I was a semi-pro downhiller racing in Park City, Utah, and there was a corner that I thought just sucked,” he recalls. “I told Jan Karpiel, one of my sponsors, about it, and he said: ‘The corner doesn’t suck, you suck at that corner.’ I realized then that training my weaknesses is far more important than sticking with my strengths.”
21. Check Your Tire Pressure
Here are some basic guidelines from Michelin.
Road/Commuter: If you weigh more than 180 pounds, inflate to the maximum on the tire sidewall. If you weigh 110 or less, fill to the minimum. Somewhere in between? Inflate to somewhere in between.
Mountain Bike: Target somewhere between 27 and 32 psi for most tires. Ultraskinny XC tires may require as much as 35 psi. Figure on 20 to 30 psi for tubeless tires.
22. If your knee hurts in the front, raise your saddle; if it hurts in the back, lower the seat.
23. Buy a Torque Wrench and Learn How to Use It
This is mandatory for carbon parts, but will also extend the life of all stems, handlebars, bottom brackets, seatpost clamps, and suspension pivots. Our favorite is Park’s TW-5.
24. Learn to Bunnyhop on Your Road Bike
Doing an unclipped hop shows you how changes in body position affect your bike’s behavior—knowledge that will boost your confidence on steep downhills, rough roads, and in corners.
A: Replace your clipless pedals with platforms and your cycling shoes with soft-soled sneakers.
B: Ride across a flat, grassy field at slightly faster than walking speed, standing on your pedals, cranks level with the ground, elbows and knees slightly bent.
C: Push down on the handlebar while bending your knees even farther so you are crouched over the saddle. Then immediately pull up and back on your bar as you shift your weight back to get the front tire up.
D: With the front tire off the ground, shift your weight forward as you push the handlebar ahead and hop up with your legs to lift the rear wheel.
To see a video of these moves in action, visit BICYCLING.com/bunnyhop.
25. Fitness Takes Time
No crash diet or hell week of training will magically propel you into top form. “You’ve got to work toward it all season long,” says Pierre Rolland, the best young rider of the 2011 Tour de France.
26. Take short pulls at the front.

27. Wash Your Bike
Especially after a wet or muddy ride. Mist it with a garden hose or soak it using a bucket of soapy water. Wipe it down and rinse, then dry it with a clean rag or towel. Don’t forget to lube your chain.
28. Speaking of Your Chain. . .
A well-maintained and lubricated chain could last 3,000 road miles or more, but check it every 500. Here’s how: Take a ruler and place the 0 at the rivet of one link. If the ruler’s 12-inch mark aligns closely with another rivet, you’re in good shape. If it’s more than a 1/16th of an inch away, replace the chain.
29. Respect Your Front Brake
Applying 60 percent front brake will bring you to a smooth, controlled stop. But on steep descents or during rapid decelerations, you’ll want to rely even more heavily on the front.
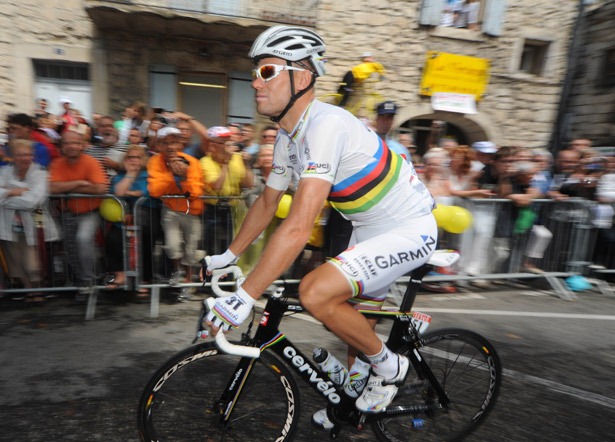
30. Stick with Your Group
Whether you’re embarking on a 500-mile charity ride or racing Paris-Nice, there’s safety in numbers. Teammates and friends can pull if you’re feeling tired, share their food, or help fix a mechanical. “I’ve seen this so many times,” says Chris Horner. “A guy is leading the race and is really strong and so he goes into a breakaway. But what happens if he crashes or flats? He is all alone. Stay with your group as long as possible.”
Be sure to shift your weight behind your saddle to prevent yourself from sailing over the handlebar.
31. Layer Like a Wedding Cake
Easily removable layers make it a snap to regulate your temperature. Booties, vests, and skullcaps, as well as arm, knee, and leg warmers, can all be stashed in pockets as the day warms up.
32. Keep Your Head Up
Looking far down the road or trail will help you see approaching traffic, spot the best line through corners, or recognize when someone’s making a break.
33. Carry a frame pump. And a spare tube. And a multi-tool with a chain breaker.

34. Listen to Your Bike
“A click or pop or scraping noise doesn’t heal itself,” says Calvin Jones, director of education at Park Tool. Pay attention to the sounds emanating from your ride and you’ll know when it’s time for some TLC.
Noise: Rattling over bumps
Common Culprit: Loose bottle-cage bolts or quick-release skewers
Solution: Tighten them
Noise: Thunk/shudder during braking or over bumps
Common Culprit: Loose headset
Solution: Adjust headset to remove excess play
Noise: Squeaking while pedaling
Common Culprit: Dry chain
Solution: Lube
Noise: Pop, followed by a skipping chain
Common Culprit: Frozen chain link; worn cassette and chain
Solution: Find and free frozen link…or replace chain, chainrings, and cassette
Noise: Grinding noise during braking
Common Culprit: Grit in brake pads
Solution: Sand pads lightly to remove grit and grime
Noise: Clicks, squeals, or whines
Common Culprit: Could be any number of problems—from a loose stem to worn bottom-bracket bearings
Solution: Head to the shop
35. Have a Plan
Improvement does not come accidentally. If you want to take your riding to the next level, you need to craft a strategy and set incremental goals to reach it. “Better yet, hire a coach to guide your way,” suggests three-time Leadville 100 champion Rebecca Rusch.
36. Embrace the Rain
Unless you live in the desert, soggy rides are a part of life. Just dress appropriately: Layers and a rain jacket are optional in the summer, but become essential when temperatures start to drop.
37. Keep a Spare Kit in Your Car
You never know when you’ll have the chance to sneak in a ride. Borrowing or renting a bike is easy, but it’s harder to find a spare helmet, shoes, and chamois. Keeping a kit in your car all but ensures you’ll never miss an impromptu ride. Scour bike swaps for secondhand shoes, pedals, and other items, but buy a new helmet—decent models can be found for about $75.

38. It’s Okay to Stop
Don’t be afraid to pull over for a good swimming hole, hot spring, ice-cream stand, cafe, bakery, or dive bar. In fact, some of the best rides are planned around these diversions.
39. Keep Your Perspective
Like most young professional riders, Ted King is learning how to balance the demands of training and family obligations with the extensive travel and training his job requires. Here’s what he’s learned so far.
When training, set a goal for every ride—even if the goal is recovery.
When racing, ride smart, don’t chop corners, and remember that the local Tuesday-Night Crit is not the World Championships.
On the road, think like a motorist. Maybe there’s a reason the guy in the pickup truck was pissed at you.
40. Refuel Right
The key recovery window is the 30 minutes following a ride; that’s when your body needs protein to repair muscles and help reload its energy stores, so make sure to get at least 20 to 25 grams. Stacy Sims, a nutritionist at Stanford University, recommends six to eight ounces of nonfat Greek yogurt with walnuts or berries. Or try this protein-rich smoothie: Before heading out, put 1.5 scoops whey protein powder, 1/2 cup frozen strawberries or blueberries, 1/2 frozen banana, 2 tablespoons nonfat Greek yogurt, 2 tablespoons flaxseed meal, and 1 cup vanilla almond milk into a blender (but don’t blend it yet). Store in the refrigerator. Whirl and drink when you return.
41. Wait to eat and drink until you’re at the back.
42. Don’t half-wheel.
43. Work Your Core
Most cyclists have weak cores. To fix it, try the pedaling plank. Here’s how.
A: Assume the plank position, as if you’re doing a push-up, but rest on your forearms with your hands directly beneath your shoulders. Your legs should be extended, with your weight balanced on your toes.
B: Pull your right knee toward your chest without allowing your butt to rise.
C: Extend the leg back out and swing it to the side and back without your foot touching the floor. Perform eight to 10 times for one set, then switch legs and repeat.

44. Know What The Wind Is Doing
On blustery days, pick a route that heads into the wind first. Then get aero to minimize drag—slide into the drops and bring your elbows and knees tight to your body. In a group, ride in a single-file paceline to slice through headwinds. If the breeze is whipping across the road sideways, form an echelon (an angled paceline created by overlapping your front wheel with the rear wheel of the rider ahead of you) to keep the wind out of your face. Pedal at a higher-than-normal cadence even if it means riding a little slower. Then, turn around and enjoy a tailwind as you speed home.
45. Know Your Gear
“Don’t ever use anything new in a bike race,” says former pro racer and cycling commentator Frankie Andreu. This advice applies to backcountry mountain-bike rides, charity events, or exotic cycling vacations. Log some miles on fresh equipment before embarking on any serious ride. You don’t want to be 60 miles from home when you discover that you and your new saddle aren’t soul mates after all.
46. Get Fit To Your Bike
There is no faster way to improve your comfort or performance on the bike. “Your ideal position will change over time,” says Andy Pruitt,EdD, director of the Boulder Center for Sports Medicine in Colorado. “As you get older—say, over the age of 35—you should consider a professional bike fit every few seasons.”
47. Bring Beer
It is the currency of cycling. A cold one can serve as payment for a borrowed tube, a tip for your mechanic, or a way to celebrate another great ride.
48. Pass Fast
In a mountain-bike race, make your presence known, then pass quickly. And if someone’s passing you, let him or her by.
49. Riding Hurts
Sometimes riders at the front aren’t there because they’re faster, but because they can suffer more. Train your legs for speed, but also condition your mind to love the pain.
50. Go—Even For A Short Ride
No matter what the excuse—it’s cold, you’re tired, Shark Week is airing on the Discovery Channel—you can always shoehorn in a short ride. Head away from home for 30 minutes. If you’re still miserable, turn around—you’ll have logged an hour on the bike. Or, just keep riding.
Like this? Get MORE rules you’ll love about riding in a paceline.
Source URL: http://www.bicycling.com/training-nutrition/training-fitness/bicyclings-50-golden-rules
Links:
[1] http://www.bicycling.com/beginners/bike-skills/descend-rocket
[2] http://www.bicycling.com/beginners/bike-skills/turn-corner
[3] http://www.bicycling.com/news/pro-cycling/christian-vande-velde
[4] http://video.bicycling.com/video/Setting-Suspension-SAG
[5] http://www.bicycling.com/bunnyhop
[6] http://iwantmorerodale.com/article/9-paceline-rules/